Paulina · Dubai · Core Strength Programme · 12 Weeks

The Core Fix.

Daily vacuum · 3 sessions/week · Deep stabilisers · Obliques · Hanging work · Progressive loading

Daily Protocol 3 Sessions/Week 12 Weeks Vacuum Masterclass
Overview
Daily Protocol
Session A · Deep Core
Session B · Anti-Rotation
Session C · Power
12-Week Plan
Vacuum Masterclass
Core Strength Programme
The Weak Core Fix.
12 weeks · Daily morning protocol + 3 dedicated sessions per week · Progressive loading

Why your core is weak — and what that actually means

A weak core is not about doing more crunches. Crunches train the superficial rectus abdominis — the six-pack muscle — which has almost nothing to do with functional core strength, waist reduction, or bloating. A truly weak core means the deep stabiliser system is not firing: the transverse abdominis (the corset), the multifidus (spine stabilisers), the pelvic floor, and the diaphragm. These four muscles work as a unit. When they are weak, the belly protrudes regardless of body fat because nothing is holding it in from the inside. The vacuum, the dead bug, the ab roller, and the Pallof press are the exercises that reach these muscles. Planks and crunches do not.

The most important thing: The stomach vacuum done daily for 4 weeks produces more visible waist reduction than any amount of crunches or planks. It is the only exercise that directly trains the transverse abdominis — the corset muscle. Everything else in this programme supports it.
Structure: Daily morning protocol (10–12 min, every day, fasted) + 3 dedicated core sessions per week (20–25 min each, after gym or standalone). The daily protocol never changes. The sessions progress every 4 weeks.
The 4 Core Systems You Are Training
🔥
The 4 Core Systems
What each one does and why it matters
1
Transverse Abdominis — The Corset
Daily · Stomach vacuum + ab roller
The deepest abdominal muscle. Wraps around the entire midsection like a corset. When this fires, the waist pulls in from the inside. When it is weak, nothing holds the belly in regardless of body fat. The vacuum is the only exercise that trains it directly.
Most ImportantDeep Core
2
Multifidus — Spine Stabilisers
Daily · Dead bug + bird dog
Small muscles running along the spine. When weak: back pain, poor posture, hunched shoulders, protruding belly. The dead bug and bird dog train these without any spinal compression.
SpinePosture
3
Rectus Abdominis — The Surface
3× per week · Ab roller + hanging leg raise
The visible six-pack muscle. Trained last, not first. The ab roller is far more effective than crunches because it loads the muscle through a full range of motion under tension.
SurfaceVisible
4
Obliques — Rotation + Lateral Stability
3× per week · Pallof press + side plank + Russian twist
Internal and external obliques. Control rotation and lateral stability. A weak oblique system means the waist has no definition on the sides — no hourglass shape regardless of fat loss.
ObliquesWaist Shape
Every Morning · Before Coffee · Before Food
Daily Morning Protocol
10–12 minutes · On the floor · 7 days a week · Non-negotiable
This is the foundation. Do this every single morning before anything else. It takes 10–12 minutes. Miss one day and you reset the neural adaptation of the transverse abdominis. After 4 weeks of daily practice the waist responds visibly.
🌅
Daily Morning Sequence
Do in this exact order · Every day · 10–12 minutes
1
Stomach Vacuum
5 × 30–60 seconds · Build time each week
Lie on back or sit on bed edge. Exhale ALL air completely. Draw navel toward spine as hard as physically possible. Hold while breathing shallowly through nose. Week 1: 30 seconds. Week 2: 40 sec. Week 3: 50 sec. Week 4+: 60 seconds. This is the most important exercise in the entire programme.
Number OneCorset Muscle
2
Diaphragmatic Breathing
10 deep belly breaths · Hand on belly throughout
Hand on belly. Inhale — belly rises, chest does not. Exhale slowly and fully. This activates the parasympathetic nervous system, reduces cortisol, and directly reduces belly bloating by improving gut motility. Do this immediately after the vacuum while still lying down.
DiaphragmAnti-Bloat
3
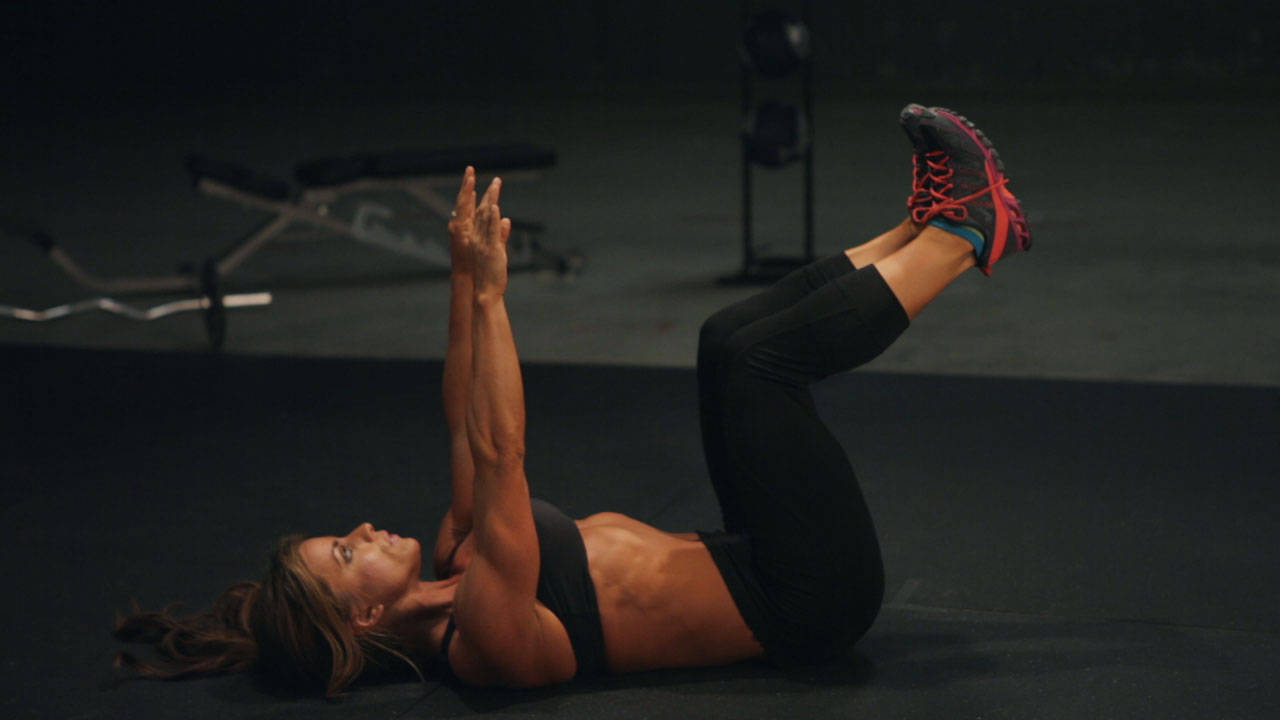
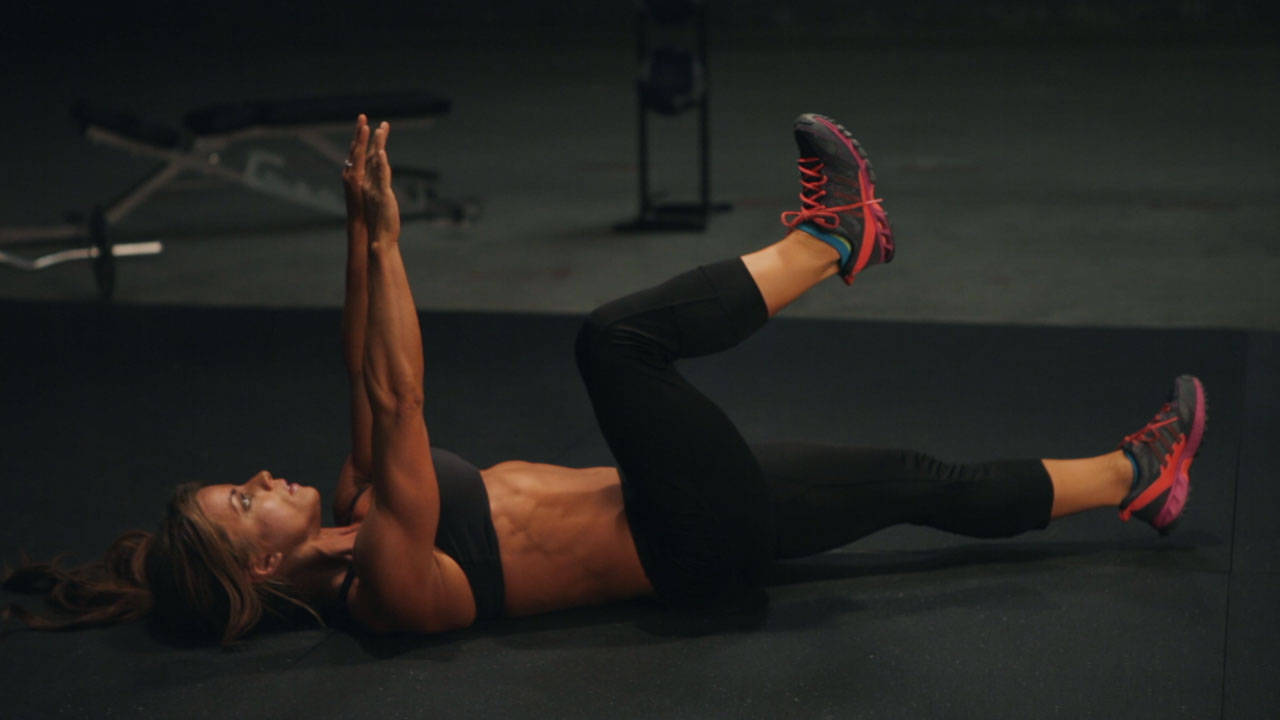
Dead Bug
3 × 10 each side · Slow · Never let back arch
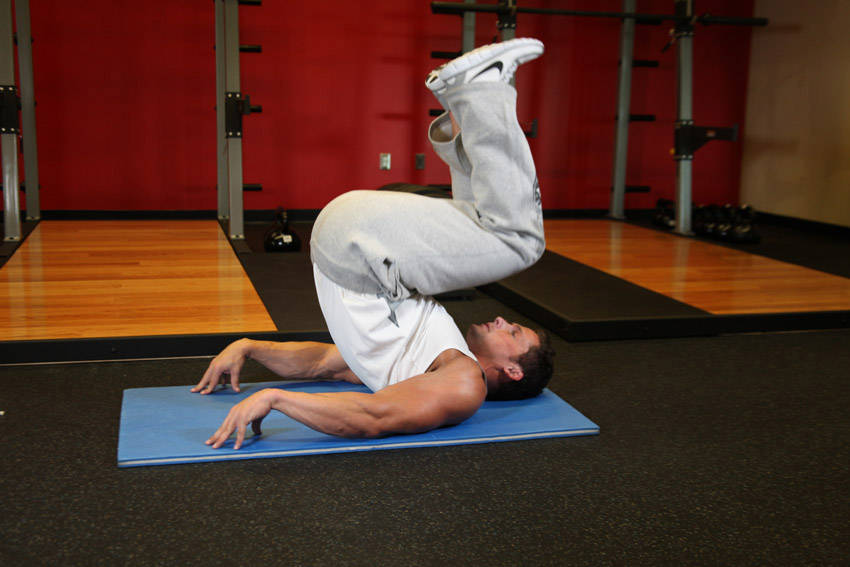
Lie on back, arms pointing to ceiling, knees at 90°. Lower opposite arm and leg slowly toward floor. The lower back must stay completely flat against the floor — this is non-negotiable. Touch nothing. Return slowly. This trains the deepest stabilisers. 3 seconds down, 1 second hold, 2 seconds back.
DailyDeep Stabilisers
4
Bird Dog
3 × 10 each side · Hold 2 seconds at extension
On all fours, hands under shoulders, knees under hips. Extend right arm and left leg simultaneously. Hold 2 seconds at full extension — arm and leg parallel to floor, spine completely neutral. Return slowly. Switch sides. The most underrated daily core exercise.
StabilitySpine
5
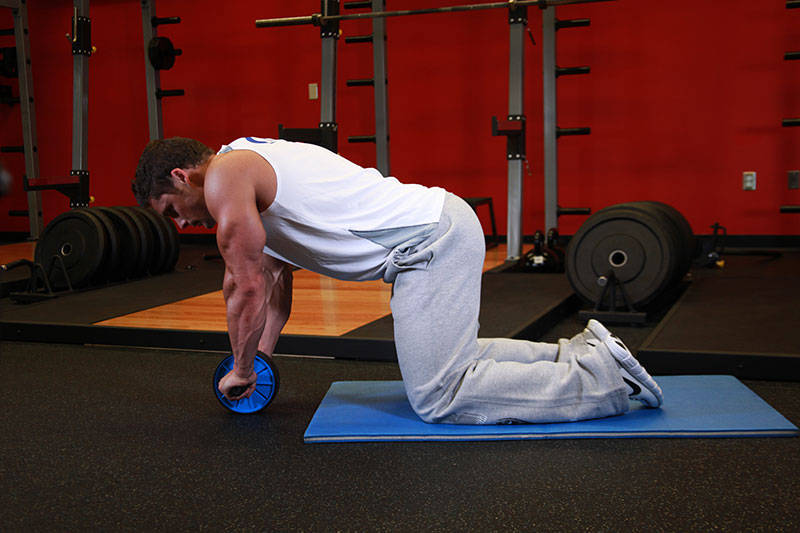
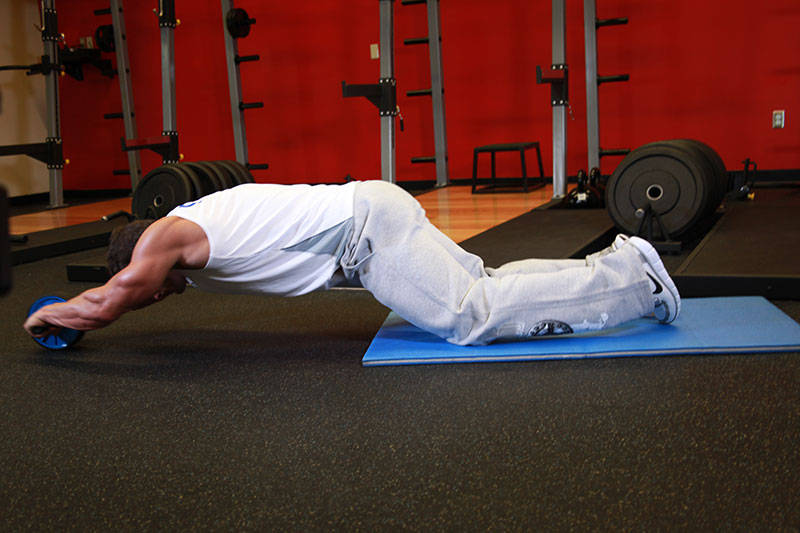
Ab Roller
4 × 6–8 reps · Slow out · Pause · Controlled back
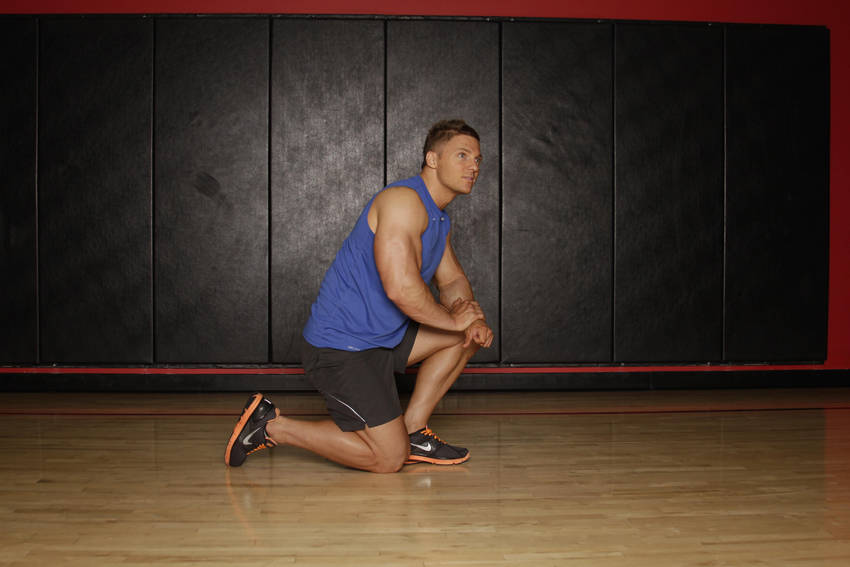
Kneel on mat. Roll out slowly — go only as far as your lower back can stay neutral. Pause 1 second at full extension. Return under complete control. This is the single most effective core exercise. Start with 6 reps and add 1 rep per week. Never let the lower back arch.
PrimaryFull Core
6
Cat-Cow
10 reps · Slow · Close the sequence
On all fours. Exhale and round spine completely upward (cat). Inhale and drop belly, lift head (cow). 10 slow reps. Decompresses spine, stimulates gut motility, reduces morning bloating mechanically. This closes the sequence — always finish with it.
SpineAnti-Bloat
Vacuum Timer
30s
 
Session A · Monday + Thursday
Deep Core Foundation
20–25 min · After gym or standalone · Focus: transverse + stabilisers
This session trains what crunches never reach. The deep core system — transverse abdominis, multifidus, pelvic floor. These are the muscles that actually flatten the belly from the inside and protect the spine under heavy gym loads.
🔥
A1 — Vacuum Superset
The most important block of the session
1
Stomach Vacuum — Extended Hold
5 × 45–60 seconds · Progressively harder each set
Session version: try to go deeper than the morning protocol. Pull the navel so hard you feel the deep lower abs engage. Between sets: 3 diaphragmatic breaths. Do not rush between sets — the breathing between sets is part of the exercise.
AnchorCorset
2
Vacuum + Arm Reach
3 × 8 each arm · Hold vacuum throughout
Hold a full stomach vacuum. While holding, slowly reach one arm forward to shoulder height. Return. Swap sides. This forces the transverse abdominis to stabilise against arm movement — much harder than a static vacuum and directly replicates real-world core demand.
Advanced VacuumStability
🔥
A2 — Anti-Extension Block
Ab roller progressions
3
Ab Roller — Full Rollout
Week 1–4: 4 × 6 · Week 5–8: 4 × 8 · Week 9–12: 4 × 10
The most effective anti-extension exercise. Slow out (3 seconds), pause 1 second at full extension, controlled return (2 seconds). Never let lower back arch. This is the exercise that produces the most visible core change. Progress rep count, not speed.
PrimaryAnti-Extension
4
Ab Roller — Stir the Pot
3 × 8 circles each direction · Week 5+
At full extension position, make small circles with the roller — 8 clockwise, 8 anticlockwise. Maintains full core tension while adding rotational demand. Significantly harder than straight rollouts. Add from Week 5 only.
AdvancedWeek 5+
🔥
A3 — Dead Bug Progressions
5
Dead Bug — Standard
3 × 10 each side · Back flat throughout · 3 sec down
Standard dead bug. The lower back must stay completely flat against the floor — if it lifts, the movement range is too large. Make it smaller. Perfect form always beats more range.
FoundationDeep Stabilisers
6
Dead Bug — Arms Only
3 × 12 each arm · Week 3+
Both knees stay at 90°. Only the arms move — one at a time, slowly lowering overhead while back stays flat. Isolates the upper deep core. Harder than it looks.
ProgressionWeek 3+
7
Dead Bug — With Resistance Band
3 × 8 each side · Week 7+ · Band across hands
Wrap a resistance band around both hands. As you lower arm and leg, the band pulls the hands apart — requires the core to resist extension AND the arms to resist separation simultaneously. Most advanced dead bug variation.
AdvancedWeek 7+
🔥
A4 — Bird Dog Progressions
8
Bird Dog — Standard
3 × 10 each side · Hold 2 sec · Hips square
Hips must stay completely square to the floor — do not rotate them as you extend the leg. This rotation is the most common fault and it defeats the entire purpose of the exercise.
Daily BaseStability
9
Bird Dog — With Elbow Tap
3 × 8 each side · Week 4+ · Tap knee to elbow
From bird dog extended position, bring elbow and knee together under the body, touch them, re-extend. This adds spinal flexion to the stability demand. Much harder.
ProgressionWeek 4+
Session B · Tuesday + Friday
Strength + Anti-Rotation
20–25 min · Obliques · Pallof press · Loaded carries · Hanging work
This session creates waist shape. The obliques — internal and external — are what give the waist its hourglass definition. They do not respond to twisting exercises like Russian twists. They respond to anti-rotation exercises that force them to resist force, not produce it.
💪
B1 — Pallof Press
The most important oblique exercise
1
Pallof Press — Standing
4 × 12 each side · Week 1: light band · Build load
Attach band or cable at chest height. Stand sideways to anchor. Hold band at chest with both hands. Press straight out — hold 2 seconds — return to chest. The entire point of this exercise is to resist rotation. Do not rotate toward the band. The obliques are working maximally when the body stays completely still.
Anti-RotationObliques
2
Pallof Press — Kneeling
3 × 10 each side · Week 3+ · Harder than standing
Same movement but kneeling removes the leg base — the obliques must work much harder. Reduces load slightly to compensate.
ObliquesWeek 3+
💪
B2 — Side Plank Progressions
3
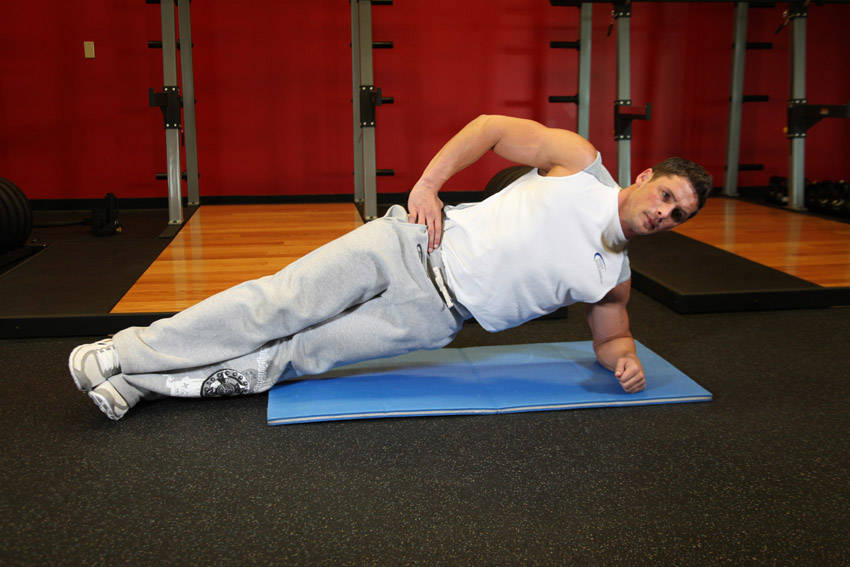
Side Plank — Elbow
Week 1–4: 3 × 30 sec each side · Build to 45 sec
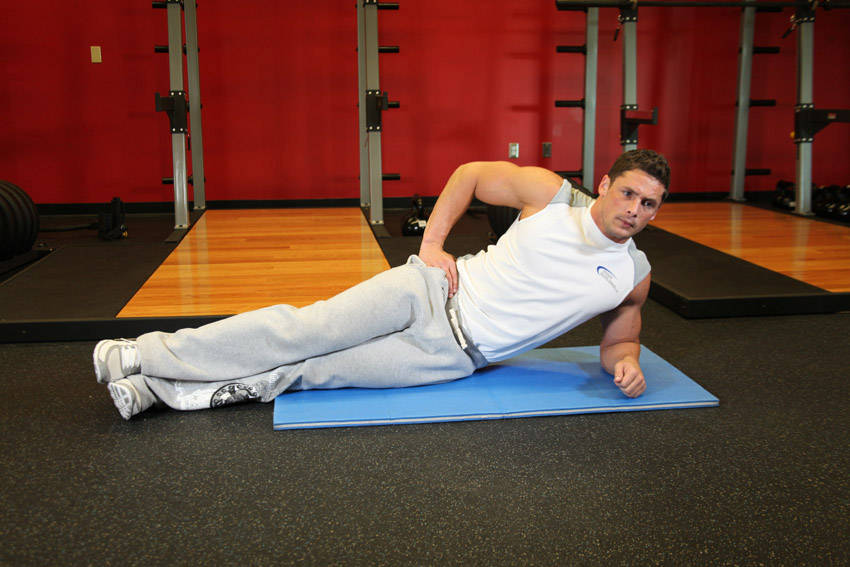
Elbow directly below shoulder. Body in one straight line from head to heel. Do not let hips drop or pike. The oblique on the top side is working maximally. This is harder than a front plank.
FoundationObliques
4
Side Plank — With Hip Dip
3 × 10 dips each side · Week 4+
From side plank position, lower the hip to almost touch the floor, raise back to plank. 10 reps. This is a controlled oblique crunch — far more effective than standard oblique crunches because the muscle works under load through full range.
Loaded ObliqueWeek 4+
5
Side Plank — With Rotation
3 × 8 each side · Week 7+
From side plank, take top arm and thread it under the body (rotating the torso), then return to side plank. This is an advanced oblique exercise. Do not attempt until standard side plank is held for 45 seconds with clean form.
AdvancedWeek 7+
💪
B3 — Hanging Core Work
6
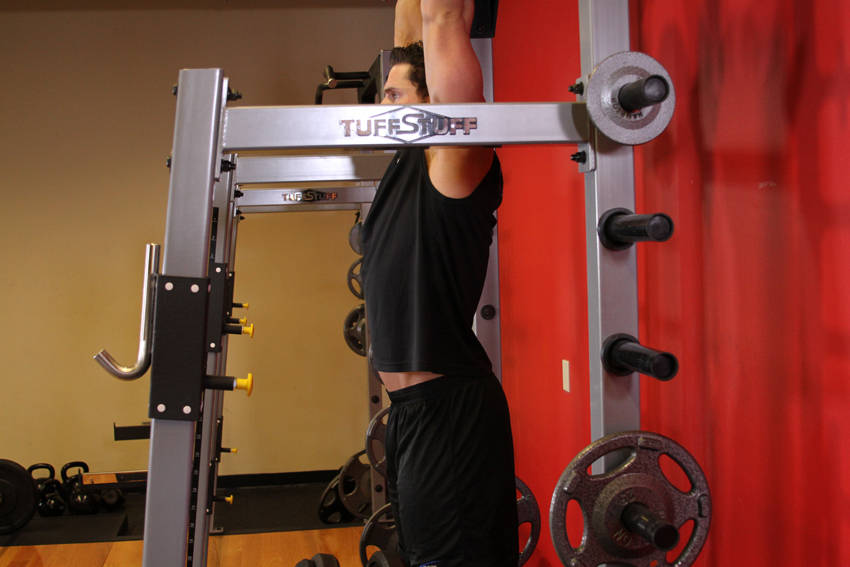
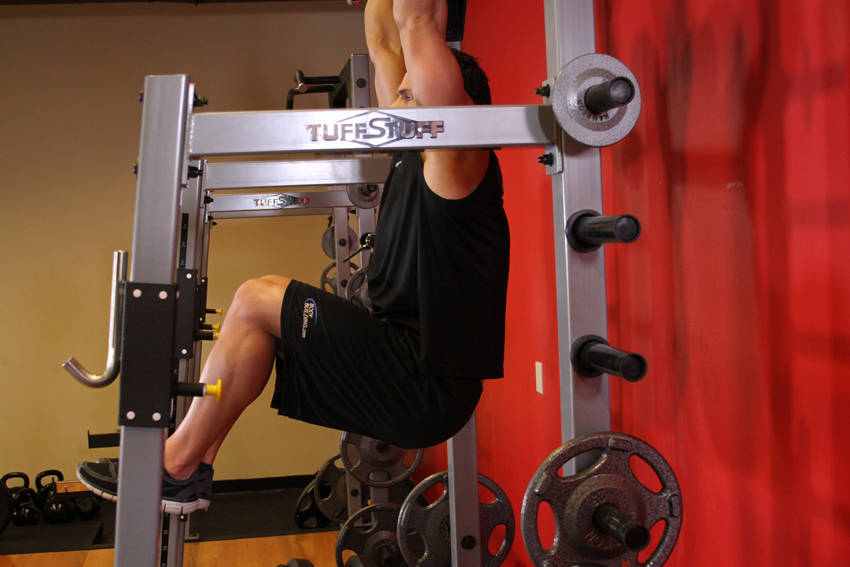
Hanging Knee Raise
Week 1–4: 3 × 10 · Controlled · No swinging
Hang from pull-up bar. Bring knees to 90° — do not swing or use momentum. Lower slowly. The hanging position decompresses the spine AND trains the lower abs and hip flexors together. If you cannot hang for 3 sets, build grip strength first.
Lower AbsHanging
7
Hanging Leg Raise — Straight Leg
Week 5+: 3 × 8 · Slow · Toes to bar level
Straight legs, raise to horizontal or higher. This is significantly harder than bent knee. The lower abs and hip flexors work maximally. No swinging — if you swing, go back to bent knee.
AdvancedWeek 5+
8
Hanging Windshield Wiper
Week 9+: 3 × 6 each side · Slow rotation
Raise legs to 90°. Rotate both legs together to one side like a windshield wiper, return to centre, rotate to the other side. This is the most advanced hanging core exercise. Obliques and lower abs under maximum load. Week 9+ only.
EliteWeek 9+
💪
B4 — Loaded Carries + Rotation
9
Suitcase Carry
3 × 30 metres each side · Heavy single dumbbell
Hold a heavy dumbbell in one hand only. Walk 30 metres. The obliques on the opposite side must resist lateral flexion — the entire core fires maximally to keep you upright. This is one of the most functional core exercises available. Use a weight that challenges you to stay straight.
FunctionalObliques
10
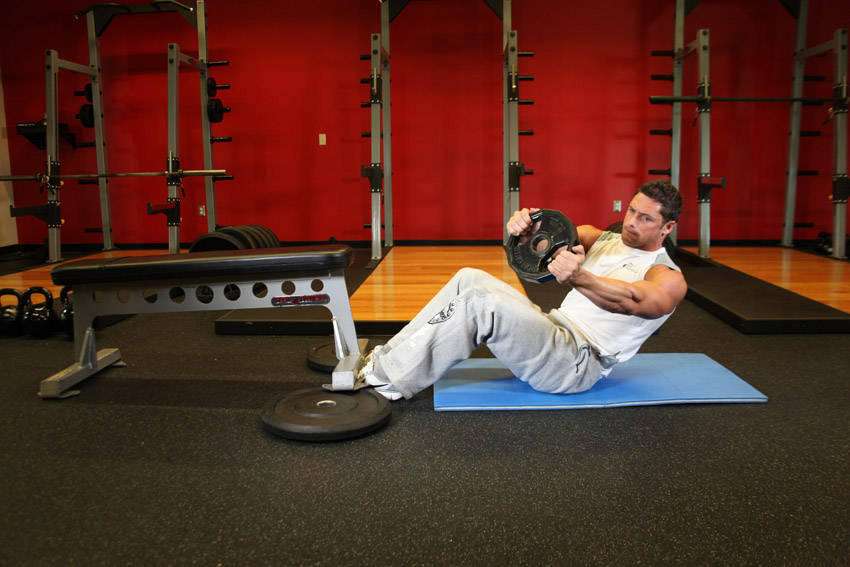
Russian Twist — Feet Elevated
3 × 20 total · Slow · Controlled touch each side
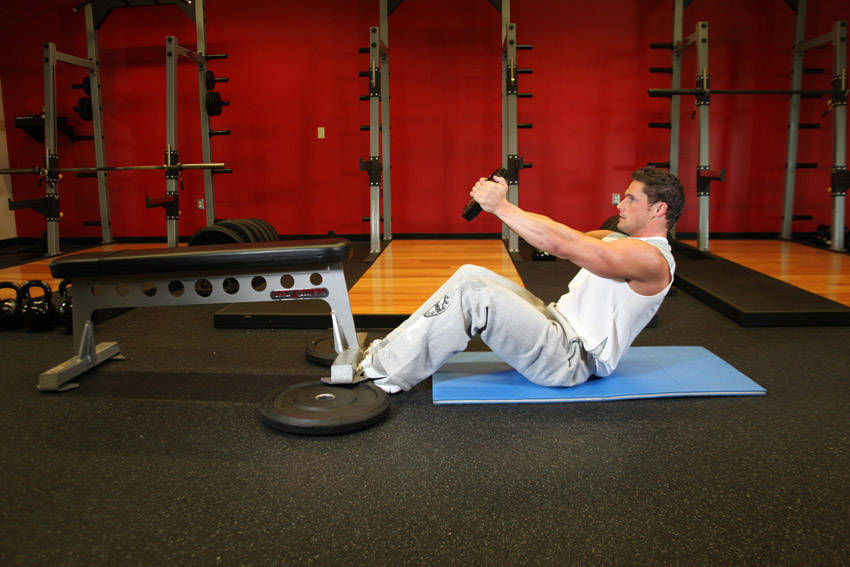
Sit with knees bent, feet elevated, lean back 45°. Hold hands together or hold a weight. Rotate to touch each side. Slow and controlled — 2 seconds each direction. Do not throw the weight. The slow controlled version works the obliques. The fast version is momentum and does nothing.
ObliquesRotation
Session C · Saturday or Sunday
Power Core + Full Integration
20–25 min · Full core integration · The hardest session
This session ties everything together. After 4–6 weeks of Sessions A and B the deep core and obliques are strong enough to handle integrated full-body core exercises. This is the session that produces visible athletic definition.
C1 — Plank Progressions
Build from base to hardest
1
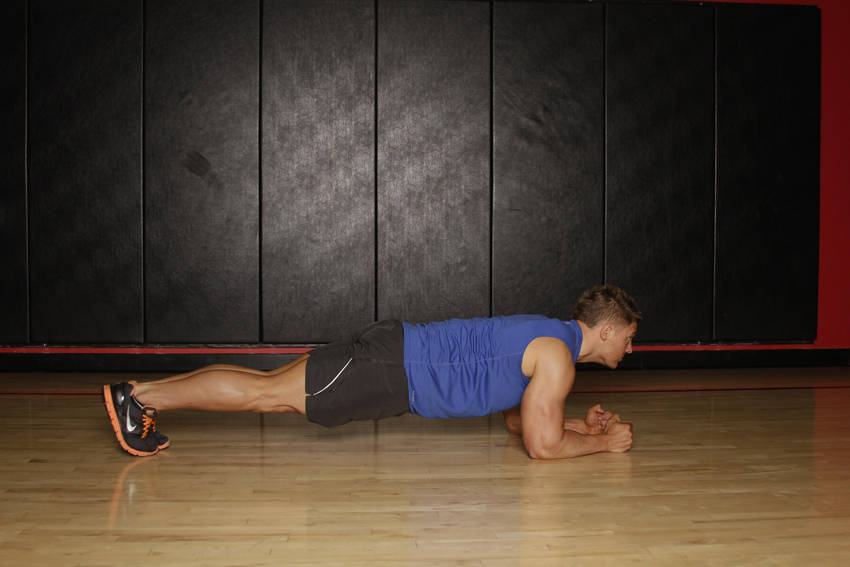
Standard Plank
Week 1–4: 3 × 45 sec · Week 5–8: 3 × 60 sec · Week 9–12: 3 × 75 sec
Elbows directly below shoulders. Body in one straight line. Squeeze glutes, abs, and quads simultaneously — all three. Do not hold your breath. Do not let hips drop or pike. This is the base.
BaseFull Core
2
Plank with Shoulder Tap
3 × 10 taps each arm · Week 3+ · Hips do not rotate
From high plank position, lift one hand and tap the opposite shoulder. Return. The hips must not rotate at all — place feet wider if needed to stabilise. Each tap forces the obliques to resist rotation under load.
Anti-RotationWeek 3+
3
Plank with Leg Lift
3 × 10 each leg · Week 5+ · Squeeze glute
From elbow plank, lift one leg 15cm off floor — squeeze the glute fully at the top, hold 1 second, lower. Do not rotate the hip. Adds posterior chain load to core stability.
IntegrationWeek 5+
4
RKC Plank
3 × 20 seconds · Week 7+ · Maximum tension
Elbow plank but squeeze everything as hard as physically possible — fists clenched, glutes maximally contracted, quads squeezed, abs braced. Pull elbows toward feet and feet toward elbows simultaneously (nothing moves). 20 seconds of this is equivalent to 60 seconds of standard plank. Most people cannot hold it for 30 seconds.
EliteWeek 7+
C2 — Mountain Climbers + Flutter Kicks
5
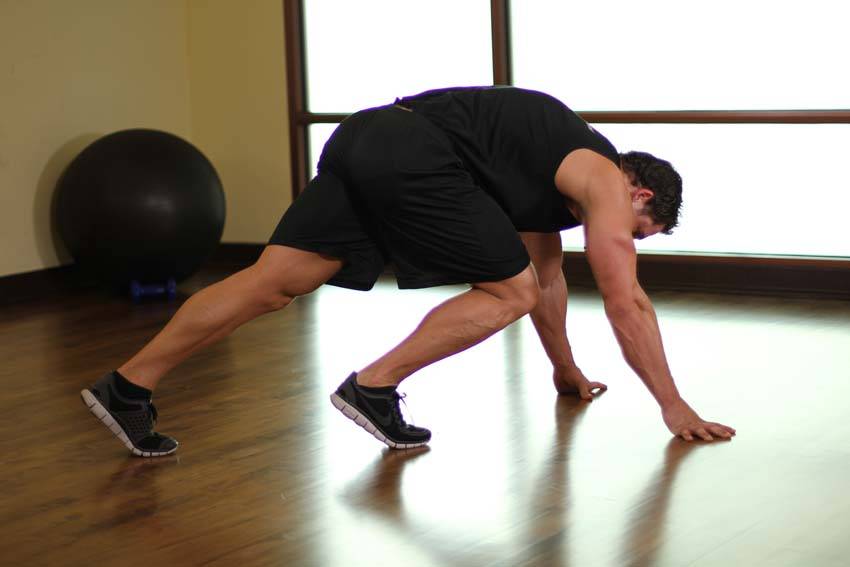
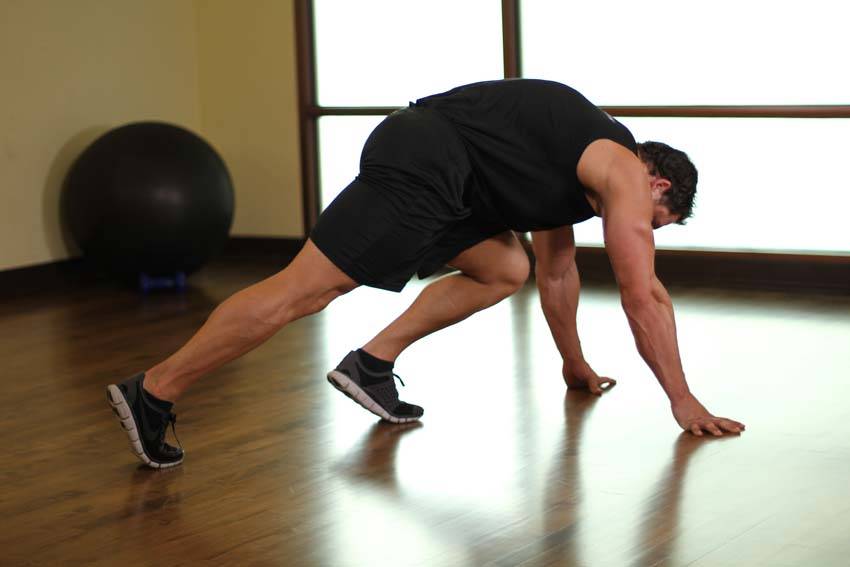
Mountain Climbers
4 × 20 total · Slow version · Week 1: slow · Week 5+: tempo
High plank position. Drive one knee to chest slowly, return, switch sides. Week 1–4: slow and controlled, 2 seconds each side. Week 5+: increase tempo to 1 second each side. Core must stay completely stable — no hip rocking.
Cardio + CoreFull Core
6
Flutter Kicks
3 × 20 seconds · Legs low · Back flat
Lie on back, hands under hips, legs extended. Raise legs 15cm off floor. Alternate kicking up and down in small controlled movements. The lower back must stay flat — if it arches, raise the legs higher. These specifically target the lower abs which the vacuum does not reach directly.
Lower AbsLower Belly
C3 — Hollow Body + L-Sit
7
Hollow Body Hold
Week 1–4: 3 × 20 sec · Week 5+: 3 × 30 sec · Week 9+: 3 × 45 sec
Lie on back. Press lower back into floor. Raise shoulders and legs simultaneously to create a banana/dish shape. Arms overhead or by sides. This is the gymnastic foundation exercise and it is brutally hard on the deep core. If lower back lifts — bend knees or raise legs higher.
Gymnastic CoreFull Integration
8
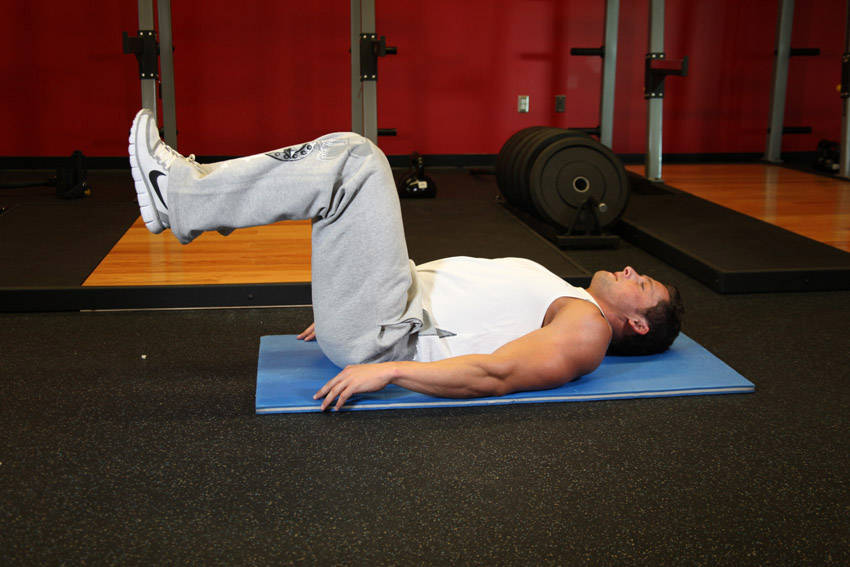
Reverse Crunch
3 × 15 · Slow · Hips roll up at top
Lie on back, knees at 90°. Curl the hips off the floor by bringing the knees toward the chest — the movement comes from the lower abs, not momentum. Lower slowly. This is the correct lower ab exercise, far superior to standard crunches.
Lower AbsHip Flexor Free
Progressive Loading
12-Week Progression
What to do each month · When to advance · What to expect
Month 1
Foundation — Install the System
Weeks 1–4 · Deload Week 4

The nervous system is learning to fire the transverse abdominis and deep stabilisers. These muscles have likely been dormant for years — the neural connection must be rebuilt before load can increase. Do not rush progression in Month 1.

Daily protocol: Vacuum 5 × 30 sec. Dead bug 3 × 10. Bird dog 3 × 10. Ab roller 4 × 6. Cat-cow 10.

Session A: Standard vacuum holds, straight rollouts, standard dead bug, standard bird dog.

Session B: Pallof press with light band, side plank 30 sec, hanging knee raise, suitcase carry.

Session C: Standard plank 45 sec, slow mountain climbers, hollow body 20 sec, reverse crunch.

Visible changes by end of Month 1: Posture improves immediately. Morning bloating reduces. Waist begins to respond to the vacuum — you will feel the muscle engaging more deeply than Week 1. Back pain if present usually reduces significantly.

Month 2
Load — Add Progressions
Weeks 5–8 · Deload Week 8

The deep core system is now functional. Add the progression exercises: vacuum with arm reach, dead bug with band, bird dog elbow tap, Pallof press kneeling, side plank hip dips, hanging straight leg raise, plank shoulder tap, plank leg lift, tempo mountain climbers, hollow body 30 sec.

Daily protocol: Vacuum 5 × 45–50 sec. Ab roller 4 × 8. All others same.

Visible changes by end of Month 2: Waist visibly tighter. The vacuum now produces a noticeable hollowing — visible in the mirror. Side plank reveals oblique definition. Posture is significantly improved. Heavy gym lifts feel more stable because the core is now supporting the spine properly.

Month 3
Peak — Elite Variations
Weeks 9–12 · Deload Week 12

All elite progressions: dead bug with resistance band, windshield wipers on bar, RKC plank, side plank rotation, hollow body 45 sec. The core is now genuinely strong — not aesthetically strong but functionally strong. Heavy hip thrusts, RDLs, and overhead pressing all feel dramatically more stable and controlled.

Daily protocol: Vacuum 5 × 60 sec. Ab roller 4 × 10. All others same.

Visible changes by end of Month 3: Waist is fundamentally different. The transverse abdominis is now a strong, trained muscle — it engages automatically during all movement. The belly does not protrude at rest. Oblique definition is visible. The overall silhouette is transformed — not just thinner but shaped.

Weekly Session Schedule
DayMorning ProtocolCore SessionGym
Monday10–12 minSession A — Deep CoreGlutes + Back
Tuesday10–12 minSession B — Anti-RotationShoulders + Triceps
Wednesday10–12 minRest from core sessionsQuads + Glutes
Thursday10–12 minSession A — Deep CoreUpper Body
Friday10–12 minSession B — Anti-RotationFull Body
Saturday10–12 minSession C — Power IntegrationZone 2 Bike
Sunday10–12 minRest · Walk onlyRecovery
The Single Most Important Exercise
Vacuum Masterclass
How to do it · Why it works · Common mistakes · Progressions

Why the vacuum outperforms everything

The transverse abdominis is the only muscle that physically pulls the waist inward. It does not shorten the torso like crunches. It does not compress the spine like situps. It cinches the entire midsection from the inside — like tightening a belt one notch. When this muscle is strong and trained, it engages automatically during all movement and at rest. A strong TVA is the difference between a belly that protrudes and a waist that is held in. No amount of body fat loss produces this effect — it is purely muscular. This is why very lean people can still have a soft protruding belly: the TVA is not trained.

🫁
The Vacuum — Step by Step
Master this before adding anything else
Step 1
Empty the Lungs Completely
Exhale until there is absolutely nothing left
Most people exhale 70–80% of their air and then try to vacuum. This is wrong. You must exhale 100% of the air from your lungs first. The vacuum draws in because the lungs are creating a low-pressure zone in the chest. If there is air left, the pressure is not low enough to pull the TVA deep.
Critical
Step 2
Draw the Navel Toward the Spine
Pull up and in — not just in
The movement is up and in — toward the spine AND toward the ribcage. Many people only pull inward which creates a surface contraction of the rectus abdominis. The TVA contraction feels like something lifting from below the belly button and pulling the entire midsection inward from the deepest layer.
Technique
Step 3
Hold and Breathe Shallowly
Nasal breathing only · Chest only · Do not release TVA
Once the vacuum is established, breathe in very small shallow amounts through the nose — only into the upper chest. The belly must stay pulled in throughout. This is the hard part. Week 1: most people can hold for 15–20 seconds before the TVA releases involuntarily. By Week 4 the hold is 60 seconds.
Technique
Step 4
Release Slowly
Do not just release — slowly allow the belly to return
Release the vacuum slowly and with control. This eccentric release also trains the TVA. Immediately exhale again and repeat for the next set.
Technique
🫁
Vacuum Progressions — 4 Positions
Each position is harder than the last
1
Supine (Lying Down)
Easiest · Start here · Gravity helps the TVA
Lie on back with knees bent. Gravity assists the abdominal organs to move back toward the spine, making the vacuum easier to establish. This is where everyone starts. Master 5 × 30 sec here before progressing.
Start Here
2
Seated
Week 3+ · Neutral gravity · Harder
Sit on edge of a chair or cross-legged on floor. Gravity is now neutral — the TVA must work harder without gravitational assistance. Same technique.
ProgressionWeek 3+
3
Standing
Week 5+ · Gravity against you · Much harder
Stand with feet hip-width apart, hands on knees slightly bent. Gravity now pulls the abdominal contents forward — the TVA must fight harder to draw them back. This is the functional position.
ProgressionWeek 5+
4
On All Fours — The Arnold Vacuum
Week 7+ · Hardest · Gravity maximally against TVA
On all fours, hands under shoulders, knees under hips. In this position gravity pulls all abdominal contents maximally downward — the TVA must pull them up against full gravitational load. This is the position Arnold Schwarzenegger used. 30 seconds in this position produces more TVA strength than 60 seconds supine.
AdvancedWeek 7+
Vacuum Practice Timer
30s